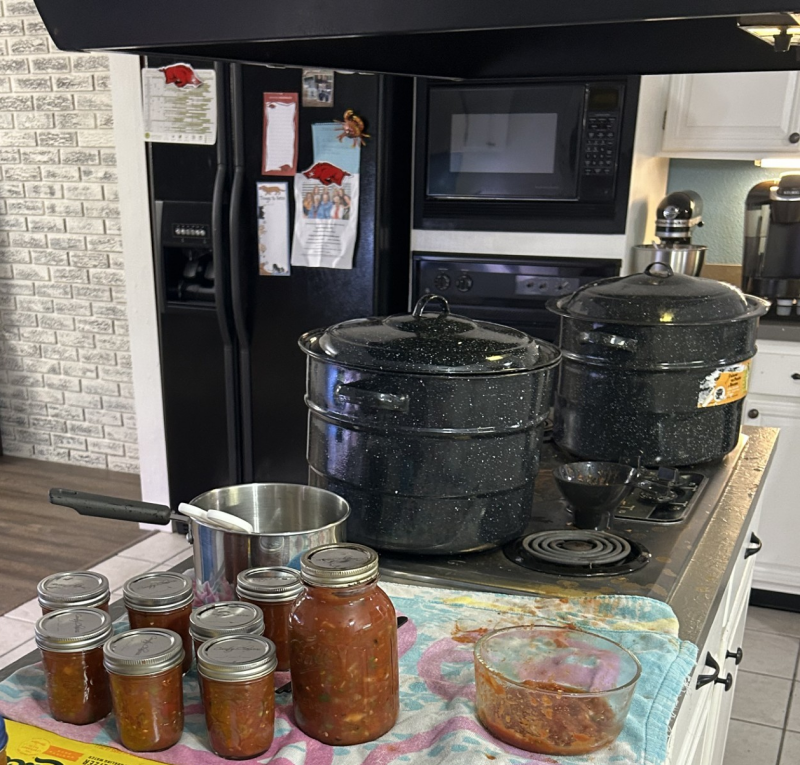
Homemade Canned Spaghetti Sauce
Garden Fresh • Pantry Friendly • Made From Scratch
There is something so satisfying about opening a jar of homemade spaghetti sauce in the middle of winter and knowing those tomatoes came from summer's harvest.
Making and canning our own spaghetti sauce has become one of my favorite ways to stock our pantry. Not only do I know exactly what's going into the sauce, but having jars ready to go makes weeknight dinners so much easier.
We use it for traditional spaghetti, meatballs, lasagna, meatball subs, and one of our favorites—Budget-Friendly Spaghetti Squash & Homemade Meatballs.
And when tomatoes are plentiful from the garden or available at a good price, canning is a great way to make sure they don't go to waste.
Canning Safety Note: For shelf-stable sauce, I use a research-tested pressure-canning recipe. The ingredient proportions and processing instructions below are based on the National Center for Home Food Preservation's tested Spaghetti Sauce Without Meat recipe. Don't increase the amount of onions, peppers or mushrooms.
🍅 Ingredients
Yield: About 9 pints
- 30 pounds tomatoes
- 1 cup chopped onion
- 5 cloves garlic, minced
- 1 cup chopped green pepper or celery
- 1 pound fresh mushrooms, sliced — optional
- ¼ cup vegetable oil
- 2 tablespoons oregano
- 4 tablespoons minced parsley
- 2 teaspoons black pepper
- 4½ teaspoons salt
- ¼ cup brown sugar
These amounts are based on the tested NCHFP recipe. I wouldn't increase the onions, peppers or mushrooms or add other vegetables when you're making the shelf-stable canned version.
Want to customize it? That's something I'd do after opening the jar. When it's time for dinner, you can add extra garlic, herbs, vegetables, meat or seasonings while heating the sauce.
This post contains affiliate links. As an Amazon Associate I earn from qualifying purchases.
🍅 Step 1: Prepare the Tomatoes
There are several ways to prepare tomatoes for homemade spaghetti sauce, but our favorite is using our KitchenAid Stand Mixer with the fruit and vegetable strainer attachment.
This post contains affiliate links. As an Amazon Associate I earn from qualifying purchases.
Wash and prepare the tomatoes according to the tested canning recipe. The KitchenAid attachment makes quick work of separating the tomato pulp and juice from the skins and seeds.
I especially love using this attachment during canning season when we're processing large amounts of tomatoes. It saves time and leaves very little waste behind.
🍅 Step 2: Cook the Sauce
Prepare the onion, garlic, and green pepper or celery according to the recipe.
Combine the prepared tomatoes and vegetables in a large stock pot. Add the vegetable oil, oregano, parsley, black pepper, salt, and brown sugar.
Bring the mixture to a boil, then reduce the heat and simmer uncovered, stirring frequently to prevent scorching.
Continue cooking until the sauce has reduced by nearly half and reaches a thick, sauce-like consistency.
🌿 Dinner with Durf Tip
Want more garlic, herbs, vegetables, or spice?
Instead of changing the ingredients in the tested canning recipe, customize your sauce after you open the jar for dinner. This lets you change the flavor without altering the tested formulation used for canning.
🫙 Step 3: Prepare & Fill the Jars
Wash your canning jars and keep them hot until you're ready to fill them.
Because the jars will be processed in a pressure canner for longer than 10 minutes, they do not need to be pre-sterilized.
Ladle the hot spaghetti sauce into hot jars, leaving 1 inch of headspace.
Remove air bubbles, adjust the headspace if necessary, and wipe the rims of the jars. Center the lids and apply the bands according to the manufacturer's instructions.
Do not add bottled lemon juice to this particular recipe. Follow the tested NCHFP recipe exactly.
♨️ Step 4: Pressure Can the Spaghetti Sauce
This spaghetti sauce is processed in a pressure canner — not a boiling-water-bath canner.
Always use the processing time and pressure appropriate for your jar size, canner type, and altitude.
Dial-Gauge Pressure Canner
Jar Size Time 0–2,000 ft 2,001–4,000 ft 4,001–6,000 ft 6,001–8,000 ft
Pints 20 min 11 PSI 12PSI 13 PSI 14 PSI
Quarts 25 min 11 PSI 12 PSI 13 PSI 14 PSI
Weighted-Gauge Pressure Canner
Jar Size Time 0–1,000 ft Above 1,000 ft
Pints 20 min 10 PSI 15 PSI
Quarts 25 min 10 PSI 15 PSI
For complete processing and altitude instructions, I recommend reviewing the National Center for Home Food Preservation's tested Spaghetti Sauce Without Meat recipe before you begin canning.
NCHFP Spaghetti Sauce Without Meat
🫙 Step 5: Cool & Check the Seals
When processing is complete, turn off the heat and allow the pressure canner to depressurize naturally. Follow the manufacturer's directions for your particular canner before opening it.
Carefully remove the jars and place them upright on a towel or cooling surface where they won't be disturbed.
Allow the jars to cool for 12–24 hours.
After cooling, check the seals. The center of a properly sealed lid should be concave and shouldn't flex up and down when pressed.
Remove the bands, label and date your jars, and store them in a cool, dark, dry location.
If a jar doesn't seal properly, refrigerate, freeze, or reprocess it according to current safe-canning recommendations.
Then change your “My Favorite Canning Tools” section
Right now that section still reads like instructions from me to you. I would replace the entire section with:
🛒 My Favorite Tools for Canning Spaghetti Sauce
Having the right equipment makes processing a big batch of tomatoes so much easier. These are some of the tools we use when making our homemade spaghetti sauce.
KitchenAid Stand Mixer
Our KitchenAid gets plenty of use during canning season, especially when we're processing large batches of tomatoes.
KitchenAid Fruit & Vegetable Strainer Attachment
This is one of my favorite tools for processing tomatoes. It separates the pulp and juice from the skins and seeds and saves us a lot of time.
Large Stock Pot
A large pot gives the sauce plenty of room to simmer and reduce without overflowing.
Pressure Canner
A true pressure canner is essential for this particular tested spaghetti sauce recipe. Always follow the manufacturer's directions for your canner along with the tested recipe.
As an Amazon Associate I earn from qualifying purchases.
🏡 How to Store Home-Canned Spaghetti Sauce
Store properly sealed jars in a clean, cool, dark and dry location, ideally between 50–70°F.
For the best quality, NCHFP recommends canning only as much food as you'll use within about one year.
Always inspect a jar before using it. Don't taste food from a jar with a failed seal or signs of spoilage.
💰 Why We Can Spaghetti Sauce
For me, canning isn't only about preserving food. It's also about making future dinners easier.
When tomatoes are plentiful, I can turn them into something we'll use throughout the year. Then on a busy weeknight, dinner can be as simple as opening a jar, heating the sauce and adding pasta or something I've already meal-prepped.
That's one of my favorite ways to approach eating well on a budget:
Buy or grow ingredients when they're plentiful → preserve them → shop your pantry later.
And there's something pretty satisfying about skipping the spaghetti-sauce aisle because you've already got your own waiting at home.
🍝 Ways to Use Your Homemade Sauce
We use this sauce for spaghetti and homemade meatballs, spaghetti squash and meatballs, lasagna, baked pasta, meatball subs and other easy weeknight dinners.
One of my favorites is my Budget-Friendly Spaghetti Squash & Homemade Meatballs, which feeds four for about $2.91 per serving.
🛒 My Favorite Canning Tools
You already have some very natural affiliate opportunities on this page. I wouldn't use all ten of your existing links. Four is plenty.
KitchenAid Stand Mixer
Use your existing affiliate link on the first mention of your KitchenAid.
KitchenAid Fruit & Vegetable Strainer Attachment
This is probably your strongest affiliate product on the entire page because you actually explain why you use it and how it makes processing tomatoes easier.
Large Stock Pot
Link this where you're cooking and reducing the sauce.
Pressure Canner
For the revised recipe, this should replace your existing water-bath-canner recommendation. Be sure the product you're linking to is actually a pressure canner rated for home canning, not simply a pressure cooker.
I'd put your disclosure immediately before the first affiliate link:
This post contains affiliate links. As an Amazon Associate I earn from qualifying purchases.
❤️ From Garden to Pantry
There's a lot of work involved in processing 30 pounds of tomatoes, but when I look at those jars lined up on the pantry shelf, it's worth it.
Each jar represents a future dinner that's already partly made.
And that's what I love about canning: a little extra work today can make life easier—and less expensive—months from now.
For more information if you're new to canning, visit my Canning Basics page.